How To Check Front Brake Pads Without Removing Wheel | Safe DIY Guide
Your front brake pads do most of the stopping work on your vehicle. Waiting until you hear grinding noises or feel vibration means the pads are already worn too far.
The good news is you can check front brake pads without removing the wheel using a flashlight, a simple inspection angle, and a few smart tricks.
This guide shows you How To Check Front Brake Pads Without Removing Wheel, ways to inspect pad thickness through the caliper window, how to read warning signs, and when a full wheel-off inspection is still necessary.
Why Checking Brake Pads Regularly Matters:
Front brake pads typically wear faster than rear pads because weight shifts forward during braking. Ignoring pad wear can lead to:
- Damaged brake rotors (expensive repair)
- Reduced stopping power
- Brake fade and overheating
- Unsafe driving conditions
A quick visual check every month can prevent all of this.
Tools You Need (No Jack Required):
You don’t need to lift the car. Just gather:
- Flashlight or phone light
- Small inspection mirror (optional but helpful)
- Gloves
- Parked vehicle on level ground
- Steering turned left/right for better view
How To Check Front Brake Pads Without Removing Wheel:
Step 1: Park and Turn the Steering Wheel
Park on flat ground, turn off the engine, and turn the steering wheel fully:
- Turn left to inspect the right front brake
- Turn right to inspect the left front brake
This exposes the brake caliper behind the wheel spokes.
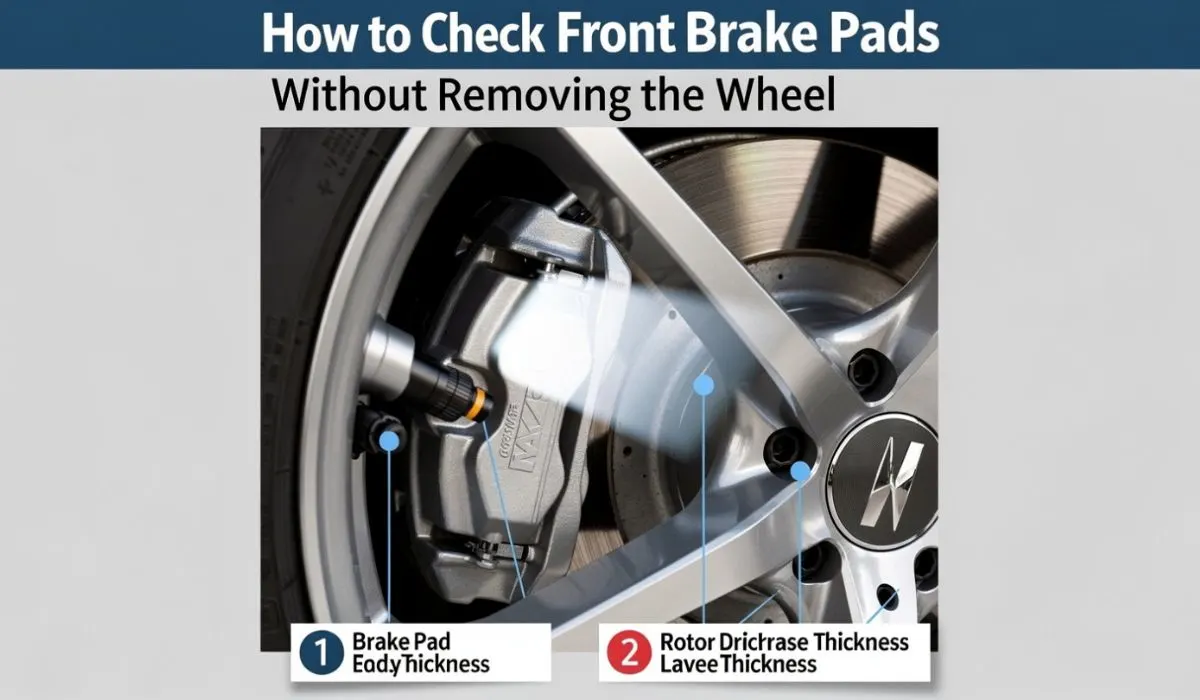
Step 2: Locate the Brake Caliper
Look through the wheel spokes. You will see the Brake caliper clamped over the rotor. Inside it sit the brake pads on both sides of the Brake disc (rotor).
You are looking for the outer brake pad, which is usually visible without removing anything.
Step 3: Shine the Light and Find the Pad Material
Use your flashlight and look at the caliper opening. You will see:
- A shiny metal rotor
- A darker block pressed against it — this is the pad friction material
- A metal backing plate behind the pad
You want to measure only the friction material, not the metal plate.
Step 4: Estimate Brake Pad Thickness
New brake pads are about 10–12 mm thick.
Use this rule of thumb:
- 8–10 mm → Like new
- 5–6 mm → Good condition
- 3–4 mm → Replace soon
- 2 mm or less → Replace immediately
If the friction material looks thinner than a coin, it’s time to change pads.
Step 5: Use a Mirror for Better Angle (Optional)
A small mirror lets you see the inner side of the caliper window and improves visibility if the spokes block your view.
Step 6: Check Both Sides
Always check both front wheels. Uneven wear can indicate:
- Sticking caliper
- Slide pin issues
- Brake imbalance
Signs Your Brake Pads Are Worn (Even Without Looking):
Even if visibility is poor, these symptoms confirm wear:
- Squeaking or squealing sound
- Grinding noise when braking
- Vibrations in steering wheel
- Car pulling to one side
- Brake warning light on dashboard
Many cars have a Brake pad wear sensor that triggers a warning.
When This Method Doesn’t Work Well:
Some wheels have tight spokes or small openings. In these cases:
- You may not clearly see pad thickness
- A wheel removal inspection becomes necessary
Also, some vehicles hide the pad behind the caliper body.
How Often Should You Check?
- Every month if you drive daily
- Before long trips
- After 10,000–15,000 km of driving
- If you notice any brake noise
Common Mistakes to Avoid:
- Confusing metal backing plate with pad material
- Checking only one side
- Inspecting in poor lighting
- Ignoring inner pad wear (which can wear faster)
Read Next: How Do You Warm Up A Hybrid Car
Pro Tip from Mechanics:
The inner pad often wears faster than the outer pad due to caliper piston pressure. If the outer pad looks borderline thin, assume the inner pad is worse.
When to Remove the Wheel for Inspection:
You should remove the wheel if:
- Pad thickness is hard to judge
- You suspect uneven wear
- You hear grinding noises
- You are close to replacement time
A wheel-off inspection gives 100% accuracy.
Safety Notes:
- Never put your hand inside the caliper
- Do not inspect right after driving (brakes are hot)
- Use proper lighting
- Do not rely only on sound; always visually confirm
Why This Method Is Trusted by Mechanics:
Professional technicians often do a quick visual pad check during routine service without removing wheels unless replacement is needed. This method is fast, safe, and surprisingly accurate.
Final Thoughts:
Learning how to check front brake pads without removing the wheel is a simple skill that can save you money and prevent dangerous brake failure. With just a flashlight and the right angle, you can assess pad health in minutes and know exactly when it’s time for replacement.
FAQs:
1. Can I really see brake pads without removing the wheel?
Yes, on most cars you can see the outer pad through the caliper window using a flashlight.
2. How thin is too thin for brake pads?
Anything 3 mm or less needs replacement soon.
3. Why does the inner pad wear faster?
Because the caliper piston presses from the inside first.
4. What if I can’t see the pad clearly?
Use a mirror or remove the wheel for a proper check.
5. Is squeaking always a sign of worn pads?
Often yes, but dust or moisture can also cause temporary noise.
6. How long do front brake pads last?
Typically 30,000 to 60,000 km depending on driving style.
7. Can worn pads damage rotors?
Yes, metal-to-metal contact can ruin the rotor surface.
8. Should both front pads be replaced together?
Always replace pads in pairs.
9. Is it safe to drive with 3 mm pads?
Short term yes, but plan replacement immediately.
10. Do all cars have wear sensors?
No, many rely only on noise as a warning.