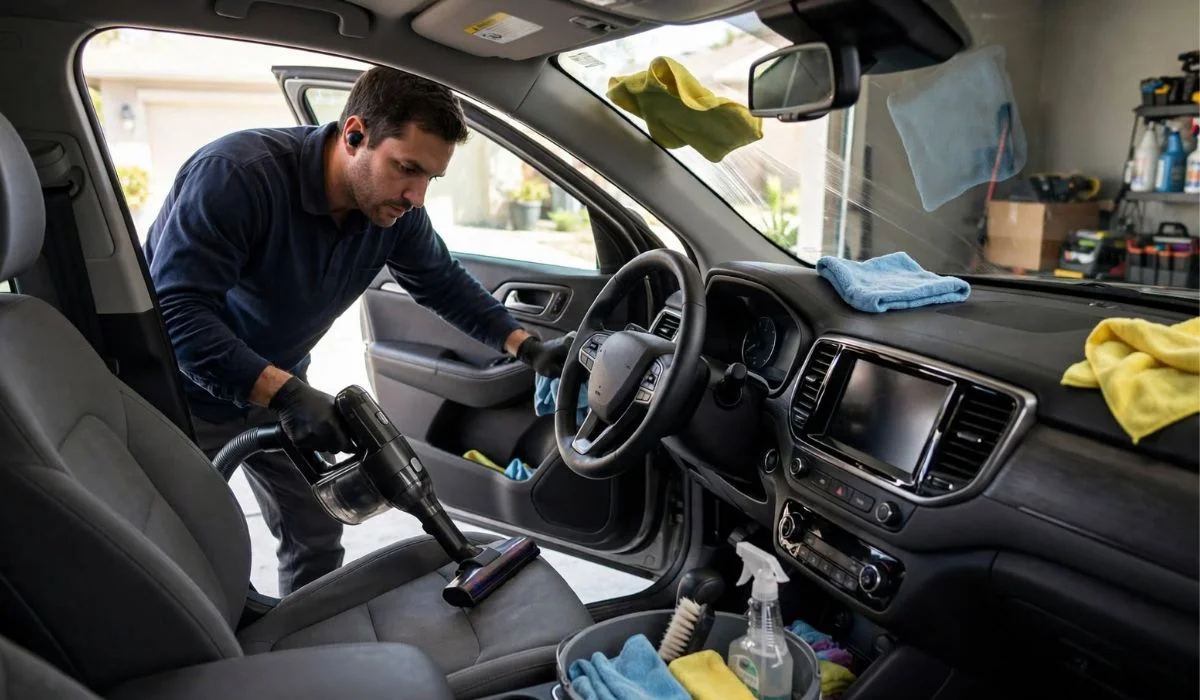
How to Clean Car Interior at Home | A Complete Step-by-Step Guide for Seats, Dashboard, Carpets, and Upholstery

A clean car interior makes everyday driving more comfortable, helps reduce unpleasant odors, and protects surfaces from unnecessary wear. You do not need expensive detailing equipment to clean most of your car interior at home. With a vacuum, microfiber cloths, suitable cleaners, brushes, and a little patience, you can freshen the seats, dashboard, carpets, doors, windows, and other interior surfaces.
The key is using the right method for each material. Leather, fabric, plastic, vinyl, glass, and electronic surfaces should not all be cleaned in the same way. Using too much water or the wrong chemical can leave stains, damage finishes, or create lingering moisture.
Whether your car needs a quick weekly refresh or a deep interior cleaning, this guide explains how to clean car interior at home from top to bottom.
What You Need to Clean a Car Interior at Home?

Before starting, gather your supplies. Having everything nearby makes the process faster and helps prevent using inappropriate household products.
Basic cleaning supplies
You may need:
- Vacuum cleaner with crevice attachments
- Microfiber towels
- Soft detailing brushes
- Small soft-bristled brush
- Interior-safe cleaner
- Glass cleaner
- Carpet or upholstery cleaner
- Leather cleaner and conditioner for genuine leather
- Bucket of clean water
- Cotton swabs
- Soft sponge
- Paper towels for specific jobs
- Rubber or nitrile gloves
- Small trash bag
You do not necessarily need every product listed. For routine cleaning, a vacuum, microfiber towels, soft brushes, and appropriate surface cleaners can accomplish most of the work.
Keep separate cloths for different jobs
Using separate microfiber towels for glass, dirty surfaces, and final wiping can prevent grime from being transferred from one area to another.
A simple system is:
- One cloth for glass
- One for dashboard and trim
- One for leather or vinyl
- One for drying
- Extra cloths for heavily dirty areas
Remove Everything From the Car First
Do not begin deep cleaning while the car is full of personal items.
Take out:
- Floor mats
- Bottles
- Receipts
- Bags
- Toys
- Tools
- Trash
- Chargers
- Loose accessories
Check underneath the seats and inside door pockets as well.
Why decluttering comes first
Small objects can hide dirt and make vacuuming difficult. Removing everything also gives you access to areas that are normally overlooked.
Once the interior is empty, open the doors and trunk so you have better access and ventilation.
Start With the Floor Mats
Floor mats collect a surprising amount of dirt, sand, food particles, and moisture.
Remove them from the vehicle before vacuuming the rest of the interior.
Cleaning rubber floor mats
Rubber mats are generally easy to clean.
- Shake or tap off loose dirt.
- Vacuum remaining debris.
- Rinse with water if appropriate.
- Use a suitable cleaner.
- Scrub grooves with a brush.
- Rinse thoroughly.
- Allow them to dry completely.
Do not put wet mats back into the car. Trapped moisture can contribute to unpleasant odors and dampness.
Cleaning carpet floor mats
For carpet mats:
- Shake out loose dirt.
- Vacuum both sides.
- Treat visible stains.
- Gently agitate the fabric with a suitable brush.
- Use an appropriate upholstery or carpet cleaner.
- Remove excess moisture.
- Let the mats dry completely.
Always follow the care instructions for the specific mat material.
Vacuum the Entire Interior
Vacuuming should happen before wet cleaning because loose dust and debris can become harder to remove once surfaces are damp.
Vacuum in a logical order
Start from the upper areas and work downward.
A useful sequence is:
- Seats
- Dashboard and surrounding areas
- Door panels
- Center console
- Floor
- Under the seats
- Trunk or cargo area
Use the crevice tool around:
- Seat rails
- Console edges
- Door gaps
- Between cushions
- Under seats
- Around the pedals
- Along carpet edges
Don’t forget hidden dirt
Move the front seats forward and backward to expose different areas of the carpet.
Check:
- Under the rear seats
- Around seat brackets
- Between the center console and seats
- Door pockets
- Cargo-area corners
A thorough vacuum can make the interior look significantly cleaner before you even use a liquid cleaner.
Clean the Dashboard
The dashboard attracts dust because it is exposed to sunlight, air movement, and everyday contact.
Use a clean microfiber cloth and an interior-safe cleaner suitable for the dashboard material.
How to clean dashboard surfaces
- Remove loose dust with a microfiber cloth or soft brush.
- Apply cleaner to the cloth rather than soaking the dashboard.
- Wipe small sections at a time.
- Use a dry microfiber towel for the final wipe.
- Pay attention to seams and vents.
Avoid leaving excessive product on the dashboard because residue can attract more dust and create an unwanted glossy appearance.
Clean the Air Vents
Air vents are easy to overlook, yet they can collect dust.
A simple vent-cleaning method
Use a soft detailing brush to loosen dust from the vent slats.
You can then vacuum the loosened debris with a small attachment.
For stubborn buildup, lightly dampen a microfiber cloth or use a suitable detailing brush.
Do not spray large amounts of liquid directly into vents.
Keeping moisture away from electronic components is particularly important.
Clean the Steering Wheel:

The steering wheel receives frequent contact from your hands and can accumulate oils, sweat, dirt, and product residue.
Use a cleaner appropriate for the steering wheel’s material.
Material matters
Leather steering wheels require different care from plastic, vinyl, or synthetic surfaces.
For leather:
- Use a leather-safe cleaner.
- Wipe gently.
- Avoid soaking the material.
- Use a suitable leather conditioner if recommended for the finish.
For synthetic materials, use a compatible interior cleaner and microfiber cloth.
Avoid aggressive scrubbing because excessive friction can damage the surface.
Clean the Center Console and Gear Shifter
The center console often collects fingerprints, dust, crumbs, and spilled drinks.
Start by removing loose debris.
Use a soft brush around:
- Gear selector
- Buttons
- Storage compartments
- Cup holders
- Console seams
- Handbrake area
Be careful around electronics
Do not spray cleaner directly onto switches, screens, buttons, charging ports, or other electronic components.
Instead, apply a small amount of suitable cleaner to a microfiber cloth and carefully wipe the surrounding surface.
For narrow gaps, a soft brush or cotton swab can help remove debris.
Clean the Car Seats
Your cleaning method should depend on the seat material.
Fabric seats, leather seats, vinyl, and synthetic upholstery each have different care requirements.
Fabric seat cleaning
For fabric upholstery:
- Vacuum thoroughly.
- Identify visible stains.
- Apply an appropriate upholstery cleaner.
- Gently agitate the fabric.
- Remove excess moisture.
- Allow the seats to dry completely.
Do not saturate the seat unnecessarily.
Excess water can penetrate deeper into the upholstery and take a long time to dry.
Leather seat cleaning
Leather requires a gentler approach.
First vacuum dirt from seams and creases.
Then:
- Apply leather-safe cleaner to a microfiber cloth.
- Wipe a small section.
- Remove residue with a clean cloth.
- Allow the surface to dry.
- Apply an appropriate conditioner if compatible with the leather finish.
Avoid harsh household cleaners unless the manufacturer specifically approves them for the material.
Remove Stains From Car Upholstery
Stains should be addressed according to their source and the upholstery material.
Common interior stains include:
- Coffee
- Soft drinks
- Food
- Grease
- Mud
- Makeup
- Ink
- Dirt
Treat stains carefully
Blot liquid spills rather than aggressively rubbing them deeper into the fabric.
Test any cleaning product on a small, inconspicuous area first.
Follow the product’s instructions and avoid mixing cleaning chemicals.
A stain that has penetrated deeply into upholstery may require professional extraction rather than repeated household treatments.
Clean the Door Panels
Door panels collect dust, fingerprints, shoe marks, and grime.
Wipe the upper surfaces with a microfiber cloth and appropriate interior cleaner.
Pay special attention to:
- Door handles
- Armrests
- Window switches
- Storage pockets
- Lower door panels
- Speaker grilles
Clean speaker grilles gently
Speaker grilles can trap dust but may be damaged by excessive moisture or aggressive brushing.
Use a soft brush or vacuum attachment carefully.
Do not soak the grille.
Clean the Seat Belts
Seat belts can accumulate body oils and dirt over time.
Pull the belt out gently and support it so it does not retract while cleaning.
Use a mild, material-compatible cleaning method recommended for the vehicle.
Avoid saturating the belt.
Allow it to dry completely before normal use.
Do not use harsh chemicals that could affect the belt material.
Clean the Windows and Mirrors
Interior glass can develop a hazy film from dust, fingerprints, smoke residue, or dashboard products.
How to clean interior glass
Use a suitable automotive glass cleaner and a clean microfiber glass cloth.
Spray the cleaner onto the cloth rather than directly onto electronic components or surrounding trim.
Wipe the glass in overlapping passes.
Finish with a dry microfiber towel.
For best visibility, check the glass from different angles to identify remaining streaks.
Clean the Rearview and Side Mirrors
Mirrors need a streak-free finish because residue can affect visibility, especially at night.
Use an appropriate glass cleaner and a clean microfiber towel.
Avoid excessive pressure around mirror edges or electronic components.
Clean the Carpets
After removing the floor mats, vacuum the carpet thoroughly.
Work slowly over heavily used areas.
Deep-cleaning carpet
For deeper cleaning:
- Vacuum first.
- Apply a suitable carpet cleaner.
- Agitate gently with a soft brush.
- Extract or wipe away moisture according to the cleaner’s instructions.
- Allow the carpet to dry completely.
Avoid flooding the carpet.
If water has already soaked deeply into the vehicle, drying becomes particularly important because trapped moisture can contribute to persistent odors and other problems.
Clean the Trunk or Cargo Area
The trunk is often forgotten during interior cleaning.
Remove everything and vacuum:
- Carpet
- Side panels
- Corners
- Under the cargo floor
- Storage compartments
Check underneath removable panels for dirt, moisture, or spilled liquids.
Look for hidden moisture
If you discover unexplained dampness, do not simply cover it with an air freshener.
Water entering the cabin or cargo area may indicate a seal, drain, window, sunroof, hatch, or other issue that needs investigation.
Deal With Bad Car Odors
Cleaning is more effective than simply masking an odor.
First identify the source.
Common causes include:
- Food spills
- Wet carpets
- Dirty upholstery
- Mold or mildew
- Smoke residue
- Pet accidents
- Forgotten trash
- Moisture beneath floor coverings
Remove the source before using an air freshener
An air freshener can make the car smell better temporarily, but it does not remove the material causing the odor.
Clean the affected surface and make sure it dries thoroughly.
If an odor continues despite cleaning, investigate hidden moisture or contamination.
Clean Touchpoints More Frequently
Some parts of the interior receive much more contact than others.
Prioritize:
- Steering wheel
- Gear selector
- Door handles
- Window switches
- Center-console buttons
- Armrests
- Seat-belt buckles
A quick wipe of high-touch surfaces can help keep the interior cleaner between deeper cleaning sessions.
What Not to Use When Cleaning a Car Interior
Not every household cleaning product is suitable for automotive materials.
Avoid harsh or unsuitable products
Be cautious with:
- Strong solvents
- Bleach
- Abrasive cleaners
- Excessive amounts of water
- Unapproved degreasers
- Rough scrubbing pads
- Products not designed for automotive surfaces
The correct cleaner depends on the material and the vehicle manufacturer’s recommendations.
Never mix cleaning chemicals
Mixing household cleaning products can produce dangerous chemical reactions.
Use one product at a time and follow its label instructions.
How Often Should You Clean Your Car Interior?
There is no single schedule that works for every driver.
A practical routine is:
| Cleaning task | Suggested frequency |
|---|---|
| Remove trash | Several times per week |
| Wipe high-touch areas | Weekly |
| Vacuum | Weekly or every 1–2 weeks |
| Clean glass | Every few weeks or as needed |
| Deep-clean upholstery | Every few months or when needed |
| Deep interior detail | As needed |
Cars carrying children, pets, food, or frequently exposed to dirt may need more frequent cleaning.
A Simple 30-Minute Car Interior Cleaning Routine
If you do not have time for a full detail, concentrate on the areas that make the biggest visible difference.
Quick-clean sequence
5 minutes: Remove trash and personal items.
10 minutes: Vacuum seats, carpets, mats, and visible debris.
5 minutes: Wipe the dashboard, console, steering wheel, and door handles.
5 minutes: Clean the inside of the windows.
5 minutes: Replace the mats and check for areas that still need attention.
This routine will not replace a deep detail, but it can keep the interior looking fresh between more thorough cleanings.
How to Get Better Results When Cleaning Your Car Interior
Work from clean areas toward dirtier areas and from higher surfaces toward lower surfaces.
This prevents dust and debris from falling onto areas you have already finished.
Use minimal moisture where possible, especially around electronics.
Replace or rinse dirty microfiber towels rather than continuing to spread grime.
And give every damp surface enough time to dry before closing the car for an extended period.
When Professional Interior Detailing Makes Sense
Home cleaning is suitable for routine maintenance, but some situations call for professional equipment or expertise.
Consider professional detailing if the car has:
- Deeply embedded stains
- Severe smoke odor
- Pet urine contamination
- Mold or mildew
- Heavily soiled upholstery
- Water damage
- Difficult leather damage
- Extensive food spills
- Persistent odors
Professional detailers may have extraction machines, specialized brushes, steam equipment, and material-specific products that are difficult to replicate with household supplies.
Final Thoughts
Learning how to clean car interior at home does not require an expensive detailing setup. The most important factors are using appropriate products, working systematically, controlling moisture, and treating each surface according to its material.
Start by removing clutter and floor mats, then vacuum thoroughly. Move on to the dashboard, vents, console, steering wheel, seats, doors, carpets, glass, and cargo area. Deal with stains and odors at their source instead of simply covering them with fragrance.
A few minutes of regular maintenance can prevent dirt and spills from becoming much harder cleaning jobs later. For serious stains, persistent odors, water damage, or damaged upholstery, professional detailing may be the safer and more effective solution.
Read Next: Can You Change Tires At Home | A Complete Step-by-Step Guide
FAQs:
What is the best way to clean a car interior at home?
Start by removing trash and personal items, take out the mats, vacuum thoroughly, and then clean surfaces from top to bottom. Use a material-appropriate cleaner for fabric, leather, plastic, vinyl, and glass.
Can I use household soap to clean my car interior?
It depends on the specific material and product. Automotive surfaces can have specialized finishes, so it is generally better to use a cleaner designed for the particular surface and follow the vehicle manufacturer’s recommendations.
How do I clean my car interior without a vacuum?
Remove loose debris manually, use soft brushes and microfiber cloths, and clean small areas systematically. However, a vacuum is much more effective for removing dirt from carpets, seat seams, and hard-to-reach areas.
How can I make my car interior smell fresh?
First remove trash and identify the source of the odor. Clean spills and contaminated upholstery, then dry the interior completely. Air fresheners can add fragrance but will not eliminate the underlying source of a persistent smell.
How do I clean fabric car seats at home?
Vacuum the seats first, treat stains with an upholstery-safe cleaner, gently agitate the fabric, and remove excess moisture. Avoid soaking the seats and allow them to dry completely.
How do I clean leather car seats?
Vacuum dirt from seams, use a leather-safe cleaner with a microfiber cloth, wipe away residue, and use a compatible leather conditioner when appropriate. Avoid harsh chemicals and excessive moisture.
Can I use vinegar to clean my car interior?
Vinegar is sometimes used as a household cleaning solution, but it is not automatically suitable for every automotive surface. Before using it, check the material and manufacturer’s care recommendations, especially for leather, sensitive trim, screens, and specialty finishes.
How do I clean the dashboard without making it greasy?
Use a small amount of an interior-safe cleaner on a microfiber cloth rather than saturating the dashboard. Finish with a clean, dry microfiber towel to remove residue.
How do I clean car vents?
Use a soft detailing brush to loosen dust and carefully vacuum the debris. Avoid spraying liquid directly into the vents because moisture can reach electronic or HVAC components.
How do I clean car windows without streaks?
Use an automotive glass cleaner with a clean microfiber glass towel. Apply the cleaner to the cloth when appropriate, wipe the glass thoroughly, and finish with a dry towel.
How often should I clean my car interior?
A quick cleanup can be done weekly, while vacuuming every one to two weeks works well for many vehicles. Deep cleaning can be done every few months or whenever the interior becomes noticeably dirty.
How can I clean a very dirty car interior?
Remove everything, vacuum thoroughly, clean surfaces according to their materials, treat stains individually, and allow damp upholstery and carpets to dry completely. Severe contamination or persistent odors may require professional detailing.
What should I avoid when cleaning my car interior?
Avoid harsh solvents, abrasive products, excessive water, and cleaners that are not suitable for the surface. Never mix cleaning chemicals, and keep liquid away from electronic components.
How long does it take to clean a car interior at home?
A basic cleanup may take around 30 minutes, while a thorough interior cleaning can take several hours depending on the vehicle’s size and condition.