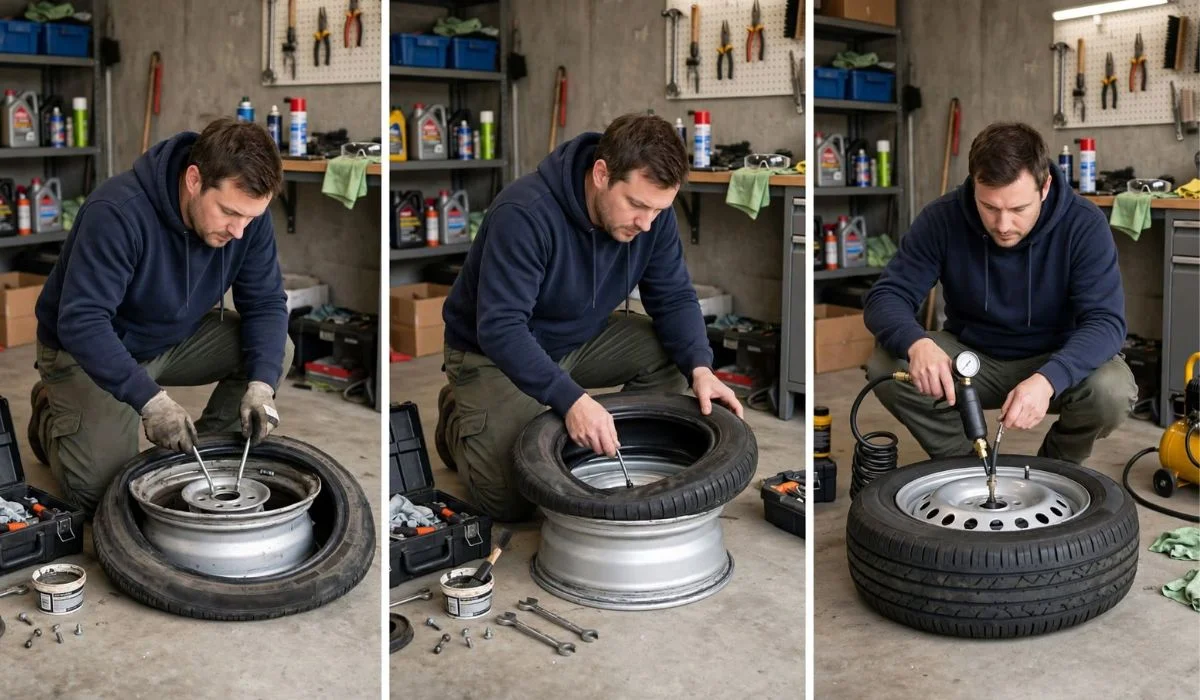
How To Change A Tyre On A Wheel At Home | Removing and Installing a Tyre Safely

Changing a tyre on a wheel at home can save money and be a useful DIY skill, but it is very different from changing a flat tyre using a spare wheel. If you mean removing a tyre from its rim and fitting a replacement tyre, you are working with a high-pressure assembly that requires the right tools and careful technique.
For passenger-car tyres, professional tyre equipment is strongly recommended. Michelin advises that tyre mounting and demounting should be performed by trained professionals with proper equipment because incorrect installation can damage the tyre bead or cause a dangerous failure during inflation.
If you have a suitable tyre changer, bead breaker, approved mounting lubricant, pressure gauge, and a safe method for inflation, you can understand the process and decide whether it is appropriate for your setup.
What You Need Before Changing a Tyre on a Wheel?
The first step is preparing the correct equipment. Trying to force a tyre onto a rim with unsuitable tools can damage both the tyre and wheel.
Essential tools and equipment
For a typical DIY tyre-mounting job, you may need:
- Replacement tyre of the correct size and specification
- Compatible wheel/rim
- Tyre changer or suitable manual mounting equipment
- Bead breaker
- Tyre mounting levers
- Approved tyre mounting lubricant
- Valve-core tool
- New valve stem for a tubeless tyre
- Accurate pressure gauge
- Air compressor
- Clip-on air chuck with an adequate hose
- Wheel chocks if the wheel is still associated with a vehicle
- Protective safety glasses
- Gloves
- Suitable safety footwear
- Torque wrench for reinstalling the wheel on the vehicle
A proper tyre changer makes the job considerably safer and reduces the chance of damaging the bead or rim.
Check the tyre and wheel match
Before removing anything, verify the tyre and wheel are compatible.
Check:
- Tyre diameter
- Tyre width
- Rim diameter
- Load rating
- Speed rating
- Wheel specifications
- Tubeless or tube-type construction
- Direction of rotation
- Any inside/outside markings
Never assume that tyres and rims with apparently similar measurements are interchangeable. Michelin specifically warns that the tyre and wheel diameters must match and that incorrect sizing can create dangerous mounting problems.
Important Safety Warning Before You Start:
A tyre can store a large amount of energy when inflated. The most dangerous part of changing a tyre on a wheel is usually bead seating during inflation.
Do not attempt to inflate a tyre assembly if you do not have appropriate equipment and understand the manufacturer’s procedures.
Never use gasoline, ether, starting fluid, or another flammable substance to force a bead onto a rim. Flammable substances inside tyres can create an explosion hazard.
Never stand, lean, or reach over the tyre and rim while inflating it. Industry guidance recommends using an appropriate restraining device or safety cage where required and keeping your body out of the potential trajectory.
How To Change A Tyre On A Wheel At Home | Removing and Installing a Tyre Safely:
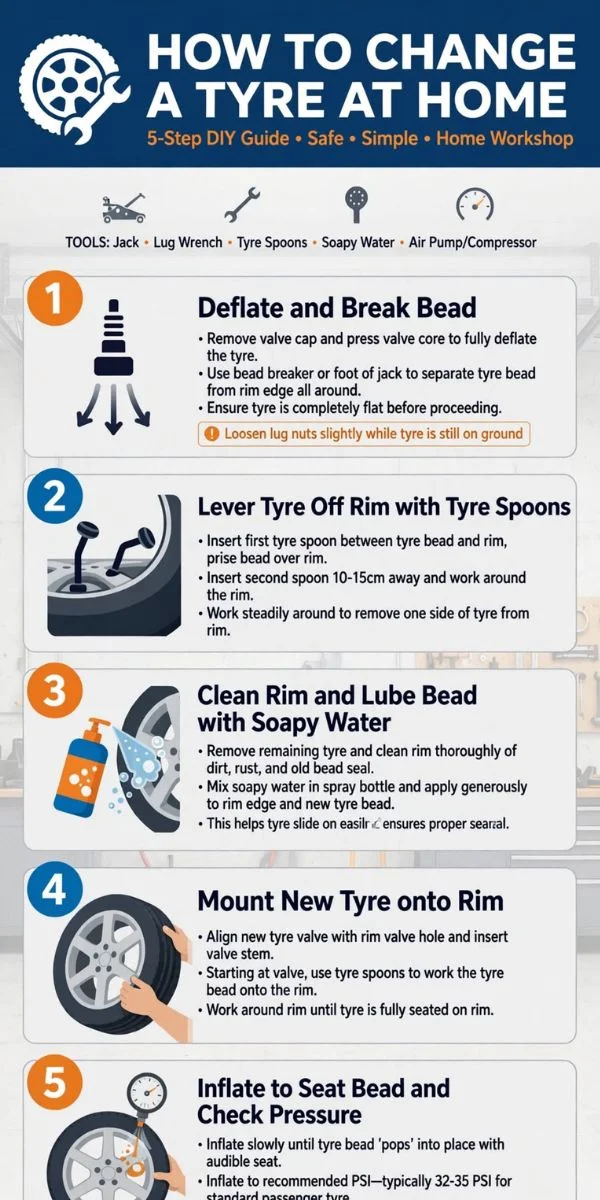
Step 1: Inspect the Replacement Tyre and Wheel
Before mounting the tyre, inspect everything carefully.
Look for:
- Cracks in the rim
- Bent rim flanges
- Corrosion
- Damaged bead seats
- Cuts in the new tyre
- Bead damage
- Foreign objects
- Incorrect tyre size
- Incorrect directional orientation
Do not mount a tyre onto a cracked, severely bent, or otherwise damaged wheel.
Also inspect the tyre’s sidewall markings. A directional tyre normally has an arrow showing the intended rotation direction, while an asymmetric tyre may have an “OUTSIDE” or similar marking. Incorrect positioning can affect handling and tyre performance.
Clean the rim
Remove dirt, rust flakes, old rubber, and debris from the bead seating area.
The rim should provide a clean, smooth surface for the tyre bead. Do not try to hide serious corrosion or structural damage with lubricant.
If the wheel is badly damaged, replacing or professionally inspecting it is safer than attempting to mount a tyre onto it.
Step 2: Completely Deflate the Old Tyre
If you are removing an old tyre, make sure it is completely deflated first.
Remove the valve core using a suitable valve-core tool and allow all pressure to escape.
Do not attempt to break the bead of a fully inflated tyre.
This is one of the most important safety steps because separating an inflated tyre from a rim can release stored energy unexpectedly. Michelin’s tyre-mounting guidance specifically instructs users to completely deflate a tyre before attempting disassembly.
Step 3: Break the Bead
The bead is the reinforced edge of the tyre that locks against the wheel’s bead seat.
Place the wheel securely on your tyre-changing equipment and use the bead breaker according to the equipment manufacturer’s instructions.
Work around the circumference rather than trying to force one small area excessively.
Why bead breaking can be difficult
An older tyre may be tightly bonded to the rim because of:
- Corrosion
- Long-term compression
- Heat
- Dirt
- Age
- Previous incorrect installation
If the bead refuses to release, stop rather than applying excessive force to the wheel.
A damaged bead seat can create problems when the replacement tyre is inflated.
Read Next: How To Check Engine Oil Level In Ford Figo | Accurate Oil Level Inspection
Step 4: Remove the Old Tyre
Once both beads have been released from the rim, use the tyre changer or appropriate tyre levers to remove the tyre.
Apply approved tyre mounting lubricant to the appropriate bead and rim areas.
Avoid using engine oil, gasoline, petroleum solvents, or random household chemicals. Tyre manufacturers recommend compatible mounting lubricants because unsuitable substances can damage rubber or interfere with safe mounting.
Work gradually around the wheel.
Do not aggressively pry against the rim flange because excessive force can bend or scratch the wheel.
Step 5: Inspect the Inside of the Wheel and Tyre
With the old tyre removed, take the opportunity to inspect areas that are normally hidden.
Check the rim for:
- Cracks
- Corrosion
- Bent sections
- Sharp edges
- Previous repair damage
- Damaged valve area
Check the replacement tyre for:
- Cuts
- Bead damage
- Sidewall damage
- Manufacturing defects
- Foreign material
- Incorrect specifications
If you discover damage that could compromise the tyre or wheel, stop the installation and have it professionally evaluated.
Step 6: Replace the Valve Stem
For many tubeless passenger-car applications, installing a new valve stem when fitting a new tyre is a sensible maintenance step.
The valve is inexpensive compared with the labour involved in removing the tyre again because of an air leak.
Use the correct valve for the wheel and tyre application.
If your wheel uses a tyre-pressure monitoring system, the procedure can be different because the wheel may contain a TPMS sensor. Do not damage the sensor while removing or mounting the tyre.
Step 7: Position the New Tyre Correctly
Before mounting the tyre, identify any markings on its sidewall.
Look for:
- Rotation arrows
- “OUTSIDE” markings
- “INSIDE” markings
- Mounting indicators
If the tyre is directional, its rotation arrow must point in the correct direction when the wheel is installed on the vehicle.
Lubricate the tyre bead with an approved mounting lubricant.
Keep the bead in the wheel’s drop center
The drop center is the recessed portion of the wheel.
Keeping the bead in this deeper area gives you the additional slack needed to install the tyre without excessive force.
This is an important technique when using a manual tyre changer or tyre levers. If the bead climbs out of the drop center, the tyre can suddenly become much harder to install.
Step 8: Mount the First Bead
Place one side of the tyre over the wheel flange.
Work progressively around the circumference while keeping the opposite side of the bead in the drop center.
Use the appropriate mounting tool rather than forcing the tyre with excessive leverage.
Approved lubrication reduces friction and helps the bead move into position without unnecessary stress. Michelin recommends lubricating the bead and rim seating surfaces with a tyre-compatible product.
Step 9: Install the Second Bead
The second bead usually requires more care because there is less room to work.
Keep as much of the bead as possible in the wheel’s drop center.
Work around the rim gradually and finish the installation according to your tyre changer’s instructions.
Do not allow the mounting tool to trap or severely pinch the bead.
If the tyre becomes extremely difficult to mount, stop and reposition it rather than simply increasing force.
A useful DIY rule
If you are bending the tyre lever dramatically or fighting the tyre with extreme force, something may be wrong.
Possible causes include:
- Incorrect tyre size
- Bead not sitting in the drop center
- Insufficient lubrication
- Incorrect mounting direction
- Damaged rim
- Damaged tyre bead
Forcing the installation can create damage that may not be immediately visible.
Step 10: Check the Bead Before Inflation
Before adding significant air pressure, inspect the tyre around the entire wheel.
Look at both sides.
The bead should appear consistently positioned around the rim.
Make sure:
- The tyre is centered
- The bead is not trapped
- The valve is correctly positioned
- No part of the bead is visibly folded
- The tyre is oriented correctly
- There is no obvious damage
This inspection is critical because bead seating problems can become dangerous during inflation.
Step 11: Inflate the Tyre Carefully
This is the point where extra caution is essential.
Use an accurate pressure gauge and appropriate inflation equipment.
Keep your body away from the tyre’s potential trajectory while inflating. Industry tyre-safety guidance specifically warns against standing, leaning, or reaching over a tyre/rim assembly during bead seating.
Do not blindly use a pressure number from another tyre.
The correct operating pressure comes from the vehicle manufacturer or applicable tyre information—not simply the maximum pressure molded on the tyre sidewall.
Never exceed the bead-seating limit
The maximum pressure allowed for bead seating depends on the tyre manufacturer’s instructions and application.
For example, Michelin’s current general passenger-tyre guidance says tyres should not be inflated beyond 40 psi (280 kPa) for bead seating, while specific tyre and equipment instructions can impose different limits.
If the bead does not seat within the manufacturer’s specified limit, stop.
Do not keep increasing pressure to force it into place.
Deflate the assembly and determine why the bead is not seating correctly.
Step 12: Check That the Bead Is Evenly Seated
After the bead seats, inspect both sides of the tyre.
Look around the entire circumference for an even bead position.
Many tyres have a molded reference line close to the bead. This line should appear consistently positioned relative to the rim when the tyre is properly seated.
If part of the bead sits noticeably deeper or higher than the surrounding section, do not assume it will correct itself.
Deflate the tyre and investigate the problem.
A badly seated bead can cause vibration, air leakage, or potentially dangerous tyre failure.
Step 13: Set the Correct Tyre Pressure
Once the tyre is properly seated, adjust it to the recommended operating pressure.
For a vehicle, use the pressure specified by the vehicle manufacturer, commonly found on the driver’s door-jamb placard, owner’s manual, or another manufacturer-specified location.
Do not automatically inflate the tyre to the maximum pressure printed on its sidewall.
The sidewall maximum and the vehicle’s recommended cold inflation pressure serve different purposes.
Step 14: Check for Air Leaks
Apply an appropriate leak-detection solution around:
- Both bead areas
- Valve stem
- Valve core
- Any suspected leak point
Watch for bubbles.
If bubbles continue to form, deflate the tyre and correct the problem rather than simply adding more air.
A leaking bead may indicate:
- Dirt on the rim
- Corrosion
- Damaged bead
- Damaged valve
- Incorrect seating
- Wheel damage
Step 15: Balance the Wheel
Mounting a new tyre can change the balance of the wheel-and-tyre assembly.
After installation, the wheel should normally be dynamically balanced using a proper wheel-balancing machine.
An unbalanced assembly can produce vibration, particularly at higher speeds.
Why balancing matters
Even if the tyre is mounted correctly, the combined tyre and wheel may not distribute mass perfectly evenly.
Balancing helps compensate for small differences in mass around the assembly.
If you do not have a balancing machine at home, this is one of the reasons a professional tyre shop may still be necessary after DIY mounting.
Step 16: Reinstall the Wheel on the Vehicle
If you have mounted the tyre onto a wheel that will go back onto the vehicle, reinstall the wheel according to the vehicle manufacturer’s instructions.
Clean the mounting surfaces and install the wheel hardware correctly.
Tighten the wheel fasteners using the manufacturer’s specified torque and a suitable torque wrench.
Do not guess the torque value.
After installation, verify the tyre pressure again.
DIY Tyre Mounting Checklist
Before considering the job finished, check:
-
Correct tyre size
-
Correct wheel size
-
Compatible tyre and rim
-
Wheel inspected for damage
-
Tyre inspected for damage
-
Old tyre completely deflated before removal
-
Correct mounting lubricant used
-
New valve installed where appropriate
-
Directional/asymmetric markings checked
-
Both beads correctly mounted
-
Beads evenly seated
-
Correct inflation pressure set
-
No air leaks
-
Wheel balanced
-
Wheel fasteners torqued correctly
-
TPMS operation checked where applicable
Common Mistakes When Changing a Tyre on a Wheel
Using household lubricant
Oil, grease, petroleum products, and solvents are not automatically safe for tyre rubber.
Use a product specifically approved for tyre mounting.
Inflating too quickly or too far
More air pressure is not the solution to a bead that refuses to seat.
If the bead does not seat within the manufacturer’s permitted pressure, stop and correct the underlying problem.
Standing directly over the tyre
Never lean over an inflating tyre.
Keep yourself outside the potential trajectory during inflation.
Mounting the wrong tyre size
A tyre should not be forced onto a wheel simply because it appears close in size.
The tyre and rim must be compatible.
Forgetting directional markings
A directional tyre installed backward can compromise the intended tread performance.
Always check the sidewall before mounting.
Reusing a damaged valve
A tyre may be perfectly installed but still lose pressure because of a poor valve or valve seal.
Skipping wheel balancing
A correctly mounted tyre can still produce vibration if the assembly is out of balance.
When You Should Not Change a Tyre at Home
DIY tyre mounting is not suitable for every situation.
A professional tyre shop is the better option if:
- You do not have a proper tyre changer
- You cannot safely restrain the wheel during inflation
- The rim is cracked or badly bent
- The rim has severe corrosion
- The tyre bead is damaged
- The tyre will not seat correctly
- The vehicle uses a complicated TPMS system
- You are dealing with a large commercial tyre
- You are unfamiliar with tyre mounting procedures
- You do not have appropriate inflation equipment
- You are unsure whether the tyre and wheel are compatible
Michelin specifically states that passenger-car tyre mounting and demounting should be performed by trained professionals using proper equipment because incorrect mounting can result in bead-seating problems or other failures.
Changing a Tyre on a Wheel vs Changing a Wheel
These two jobs are often confused.
Changing a wheel: You remove a complete wheel-and-tyre assembly from a vehicle and install another complete assembly.
Changing a tyre on a wheel: You remove the rubber tyre from the metal wheel and install a different tyre onto the same rim.
Changing a complete wheel is relatively straightforward with the correct jack, stands, tools, and vehicle-specific procedure.
Changing a tyre on a wheel involves breaking and reseating the tyre bead and therefore carries additional risks.
How Much Does It Cost to Change a Tyre on a Wheel?
The cost varies according to tyre size, vehicle type, location, and whether you are replacing one tyre or several.
A professional shop may charge separately for:
- Tyre mounting
- Valve replacement
- Wheel balancing
- Disposal of the old tyre
- TPMS service
- Additional repairs
DIY mounting can reduce labour costs if you already own the necessary equipment.
However, buying a proper tyre changer, bead breaker, compressor, balancing equipment, and safety equipment can cost significantly more than occasional professional installation.
For someone who changes tyres frequently, the equipment may eventually make sense. For occasional tyre replacement, professional installation is often the more practical choice.
Final Thoughts on Changing a Tyre on a Wheel at Home
Learning how to change a tyre on a wheel at home is possible with suitable equipment and experience, but it should not be treated like a simple household DIY project.
The critical points are compatibility, complete deflation before removal, correct lubrication, careful bead installation, controlled inflation, proper bead seating, leak testing, and wheel balancing.
Most importantly, never improvise during bead seating or inflation. A tyre and rim can fail violently if incorrectly mounted or overinflated. If you lack a suitable tyre changer, restraining equipment, or safe inflation setup, taking the wheel to a qualified tyre professional is the safer option.
FAQs
Can I change a car tyre on a wheel at home?
Technically, a skilled DIYer with appropriate tyre equipment can perform some tyre-mounting work, but manufacturers generally recommend trained professionals and proper equipment. The inflation and bead-seating stage presents significant safety risks.
What tools do I need to change a tyre on a wheel?
Common equipment includes a tyre changer, bead breaker, mounting tools, approved tyre lubricant, valve-core tool, pressure gauge, compressor, and suitable safety equipment. Proper inflation and restraint equipment are especially important.
Can I change a tyre without a tyre machine?
Some people use manual tyre levers and a bead breaker, but passenger-car tyres can be difficult to remove and install without proper equipment. Attempting to force a stiff tyre can damage the bead or wheel.
Do I need to replace the valve when fitting a new tyre?
For many tubeless applications, replacing the rubber valve stem during tyre installation is recommended. Wheels equipped with TPMS may require a vehicle-specific valve or sensor service procedure.
Can I use dish soap to mount a tyre?
It is better to use a tyre mounting lubricant specifically designed for the application. Tyre manufacturers recommend compatible lubricants and caution against substances that can harm rubber.
Why won’t my tyre bead seat?
Possible causes include incorrect tyre or rim compatibility, insufficient lubrication, a dirty or corroded rim, improper bead positioning, or a damaged bead. If it does not seat within the manufacturer’s permitted inflation pressure, stop and investigate rather than adding more pressure.
How much air pressure should I use to seat a tyre bead?
Follow the tyre manufacturer’s bead-seating instructions. Do not use a generic pressure limit as a substitute for the manufacturer’s instructions. Michelin’s general guidance for passenger tyres states not to exceed 40 psi for bead seating.
Is it dangerous to inflate a tyre after mounting it myself?
Yes, incorrect mounting or bead seating can create a serious hazard during inflation. Keep your body away from the potential trajectory and use appropriate safety equipment and procedures.
Do I need to balance a wheel after changing the tyre?
Yes, wheel balancing is normally recommended after mounting a new tyre. It helps prevent vibration caused by uneven mass distribution in the tyre-and-wheel assembly.
Can I drive immediately after mounting a new tyre?
Only after confirming that the tyre is correctly mounted, the beads are evenly seated, the pressure is correct, there are no leaks, and the wheel is properly secured and balanced. Follow the tyre and vehicle manufacturer’s recommendations before driving.
Is changing a tyre on a wheel the same as changing a flat tyre?
No. Changing a flat tyre using a spare involves removing the complete wheel and installing another wheel. Changing a tyre on a wheel involves removing the tyre from the rim and mounting a replacement tyre, which requires specialized equipment and additional safety precautions.