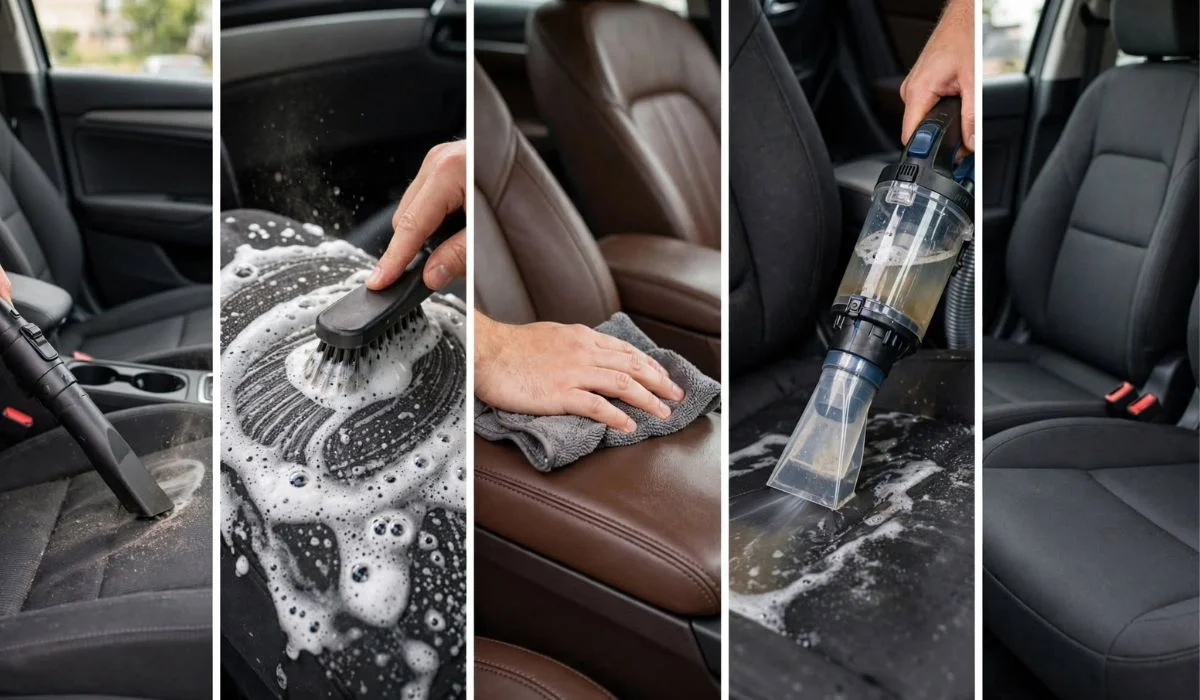
How To Deep Clean Car Seats | Built-Up Grime

Car seats collect much more than visible dirt. Dust, food crumbs, spilled drinks, body oils, sweat, pet hair, and everyday stains can build up inside the fabric over time. Regular surface cleaning helps, but a deep clean car seats routine goes further by treating stains, cleaning the upholstery, and removing grime trapped in the fibers.
The safest cleaning method depends on the seat material. Cloth upholstery can usually handle water-based cleaning, while leather, vinyl, suede-like materials, and perforated surfaces require different products and techniques. Before applying any cleaner, check the vehicle owner’s manual and the seat manufacturer’s care instructions.
How Often Should You Deep Clean Car Seats?
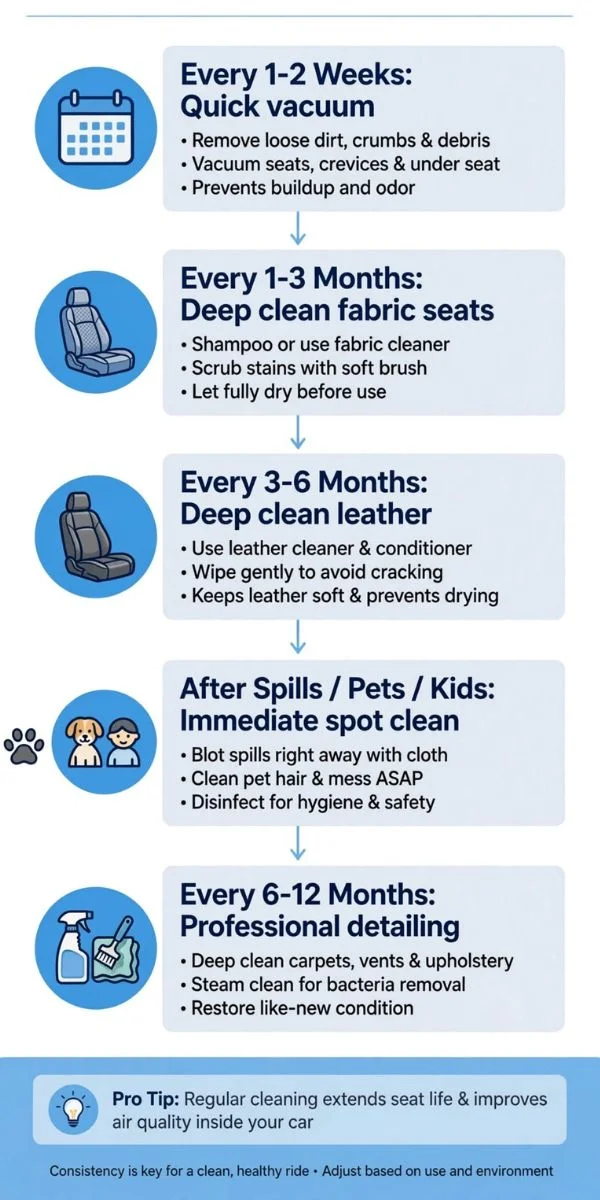
For a normally used vehicle, deep cleaning the seats every three to six months is a practical starting point. Cars used by children, pets, smokers, or people who frequently eat inside may need more frequent cleaning.
Signs Your Car Seats Need a Deep Clean
You do not have to wait for obvious stains. Look for:
- A musty or unpleasant smell
- Darkened areas where people sit frequently
- Greasy or shiny-looking fabric
- Food and drink stains
- Dirt around seams and stitching
- Pet hair embedded in upholstery
- Sticky areas from spilled beverages
- Visible discoloration
- Dust accumulating around seat crevices
A seat can look relatively clean while still containing fine particles and residue below the surface.
Identify the Seat Material Before Cleaning:

The first step is not spraying cleaner. It is identifying what you are cleaning.
Cloth and Fabric Seats
Fabric seats are common in many cars and can generally be cleaned with an upholstery or automotive fabric cleaner. They can tolerate some moisture, but excessive water can soak into the seat cushion and create prolonged drying problems.
Leather and Vinyl Seats
Leather should not be treated like fabric. Use a cleaner specifically designed for automotive leather, followed by an appropriate leather conditioner when recommended.
Vinyl is generally easier to clean than genuine leather, but harsh solvents can damage its finish.
Suede-Like or Alcantara-Type Materials
These materials need specialized care. Avoid saturating them or using random household chemicals. Always follow the manufacturer’s cleaning instructions.
Perforated Seats
Perforated leather or synthetic seats contain tiny holes that can allow liquid to enter the cushion. Use very small amounts of cleaner and avoid flooding the surface.
What You Need for a Deep Car Seat Cleaning
Gather everything before starting so you do not have to stop halfway through the process.
- Vacuum cleaner with crevice attachment
- Soft upholstery brush
- Microfiber towels
- Automotive upholstery cleaner
- Bucket of clean water
- Soft detailing brush
- Small soft toothbrush for seams
- Spray bottle
- Dry towels
- Rubber gloves
- Fan or ventilation source
- Leather cleaner and conditioner if applicable
A wet/dry vacuum or carpet extractor can make fabric-seat cleaning faster, but it is not essential.
Choose the Cleaning Product Carefully
For fabric seats, an automotive upholstery cleaner is usually preferable to strong household chemicals. Test any product on a hidden area first.
Avoid using bleach, strong degreasers, ammonia-heavy products, or products containing aggressive solvents unless the seat manufacturer specifically approves them. These chemicals can discolor fabric, weaken materials, or damage protective finishes.
Step 1: Remove Everything From the Car
Take out floor mats, child-related items, bottles, trash, seat covers, and other loose objects.
Move the front seats forward and backward to expose areas normally hidden beneath them.
Why This Matters
Objects under the seats can trap dirt and prevent you from cleaning the complete upholstery. Removing them also makes it easier to inspect the seat rails and floor area for debris.
Do not spray cleaning chemicals around electrical connectors, seat controls, or wiring underneath the seats.
Step 2: Vacuum the Seats Thoroughly
Vacuuming should happen before adding moisture.
Start at the top of the seat and work downward. Use slow passes rather than quickly moving the vacuum over the surface.
Pay Extra Attention to These Areas
- Seat seams
- Seat-back gaps
- Edges of cushions
- Between the seat and center console
- Around seat belt buckles
- Under the front edge of the cushion
- Areas where crumbs collect
Use a crevice attachment for narrow gaps.
Vacuuming first prevents loose dirt from turning into muddy residue when it becomes wet.
Step 3: Treat Stains Before Cleaning the Entire Seat
Deep cleaning is easier when stubborn stains receive individual attention first.
Identify the type of stain whenever possible.
Food and Drink Stains
Blot fresh spills with a clean towel rather than rubbing aggressively. Rubbing can push liquid deeper into fabric fibers.
Apply a suitable upholstery cleaner according to its instructions and gently agitate the affected area.
Grease and Oil Stains
Oil-based stains can be more difficult because water alone does not dissolve grease effectively. Use an automotive upholstery product designed for greasy contamination and follow its dilution instructions.
Do not pour large amounts of degreaser directly onto the seat.
Ink Stains
Ink requires extra caution because aggressive rubbing can spread the pigment. Use a cleaner specifically labeled as suitable for the upholstery material and test it in an inconspicuous location first.
Mud and Dirt
Allow heavy mud to dry when practical, then vacuum or brush away the loose material before using a damp cleaning method.
Step 4: Apply Upholstery Cleaner
For cloth seats, lightly apply an automotive upholstery cleaner to a manageable section.
Do not completely soak the seat.
Work in Small Sections
Cleaning one section at a time gives you better control over moisture and agitation.
A practical sequence is:
- Spray a small area.
- Allow the product to work for the recommended time.
- Gently agitate with a soft brush.
- Wipe or extract the loosened dirt.
- Move to the next section.
This approach reduces the chance of leaving cleaner residue across the entire seat.
Step 5: Agitate the Fabric Gently
Use a soft upholstery brush rather than a stiff household scrub brush.
Move the brush in different directions with light pressure.
Why Aggressive Scrubbing Is a Problem
Excessive brushing can roughen fabric fibers, create a worn appearance, or damage delicate upholstery. The objective is to loosen embedded dirt, not physically grind the fibers.
For seams and tight areas, a small soft detailing brush can provide better control.
Step 6: Extract or Remove the Dirty Moisture
If you have a carpet extractor or wet/dry vacuum suitable for upholstery, use it to remove loosened moisture and dirt.
For manual cleaning, use clean microfiber towels to absorb moisture.
Do Not Keep Adding Cleaner
A common mistake is repeatedly spraying a dirty area because it still looks discolored. Sometimes the remaining appearance is caused by permanent staining or fabric discoloration rather than removable dirt.
Adding more chemical can leave residue and increase drying time without improving the result.
Step 7: Rinse Carefully When Necessary
Some upholstery cleaners require rinsing or removal of residue, while others are designed to be used without a separate rinse.
Follow the product instructions.
If rinsing is appropriate, use a small amount of clean water and extract or blot it afterward.
Why Cleaner Residue Matters
Remaining detergent can attract dirt after the seat dries. This can make a freshly cleaned seat become dirty again more quickly.
Avoid repeatedly soaking the same area simply to achieve a brighter appearance.
Step 8: Clean the Seat Edges and Seams
Seams often hold more dirt than the broad center of the cushion.
Use a soft brush or microfiber cloth to work around stitching.
Check These Hidden Areas
Inspect:
- Seat-back seams
- Cushion edges
- Seat belt openings
- Areas beneath adjustable headrests
- Side bolsters
- Rear seat creases
Use minimal moisture near mechanical and electrical components.
Step 9: Clean Leather Seats Differently
If your vehicle has leather seats, do not follow the same wet-cleaning process used for fabric.
Apply a small amount of automotive leather cleaner to a microfiber cloth or according to the product directions.
Conditioning Leather
After cleaning and once the surface is appropriate for conditioning, use a manufacturer-approved leather conditioner if recommended.
Conditioning can help maintain the leather’s finish, but more product is not necessarily better. Excess conditioner can leave the surface greasy and attract dirt.
Step 10: Deal With Pet Hair
Pet hair can be difficult to remove with a standard vacuum alone.
Before deep cleaning, loosen embedded hair using a rubber pet-hair brush, upholstery tool, or another tool designed for automotive fabric.
Remove Hair Before Adding Moisture
This is important because wet hair can become more difficult to separate from upholstery fibers.
Work systematically across the seat before applying any liquid cleaner.
Step 11: Deodorize the Seats Safely
A deep clean should address the source of an odor rather than simply covering it.
Food residue, spilled beverages, moisture, smoke residue, and pet contamination can all contribute to unpleasant smells.
Avoid Heavy Fragrance Sprays
Strong fragrances may temporarily mask odors without removing the material causing them.
Clean the affected upholstery, remove residue, and allow the seat to dry completely. Persistent odors may require professional interior cleaning.
Step 12: Dry the Car Seats Completely
Drying is one of the most important parts of deep cleaning.
Open the vehicle doors or windows in a safe, dry location and use airflow to improve ventilation.
How Long Do Car Seats Take to Dry?
Drying time depends on:
- Amount of moisture used
- Upholstery material
- Temperature
- Humidity
- Air circulation
- Seat construction
A lightly dampened seat may dry relatively quickly, while heavily saturated upholstery can take much longer.
Never assume the outside is dry simply because the surface feels dry. Cushioning underneath may still contain moisture.
Read Next: How To Clean Car Seats With Carpet Cleaner | A Simple Step-by-Step Guide
Special Safety Considerations:
Car seats contain more than upholstery. Modern vehicles may have electrical components, sensors, heating elements, ventilation systems, and side-impact airbag systems integrated into or around the seats.
Heated and Ventilated Seats
Avoid excessive liquid around heated-seat controls, electrical connections, and ventilation openings.
If the owner’s manual provides specific cleaning instructions, follow those instructions instead of using a generic method.
Seats With Side Airbags
Some vehicles have side airbags integrated into the seat structure. Do not aggressively manipulate seams or upholstery areas marked for airbag deployment.
If you are uncertain about the location of airbag components, consult the owner’s manual before deep cleaning.
Common Mistakes That Can Damage Car Seats
Deep cleaning does not mean using as much water or cleaner as possible.
Mistake 1: Soaking the Cushion
Excess moisture can penetrate deeper into the seat and significantly increase drying time.
Mistake 2: Using Household Bleach
Bleach can discolor upholstery and damage materials. It should not be used as a general-purpose car-seat cleaner.
Mistake 3: Scrubbing Too Hard
Heavy pressure can damage fibers, stitching, coatings, or delicate surfaces.
Mistake 4: Ignoring Product Instructions
Different cleaners have different application and removal requirements. Always follow the label.
Mistake 5: Closing the Car Before It Dries
A damp interior with poor ventilation can develop an unpleasant musty smell.
Mistake 6: Cleaning Only the Visible Stain
A seat can develop a noticeable ring or uneven appearance when only one small section is treated. Cleaning the surrounding area may produce a more consistent finish.
Can You Deep Clean Car Seats Without an Extractor?
Yes. An extractor makes the process easier, but you can deep clean fabric seats manually.
Use this basic approach:
- Vacuum thoroughly.
- Treat individual stains.
- Apply a small amount of upholstery cleaner.
- Agitate gently.
- Wipe or blot away loosened dirt.
- Use clean, slightly damp microfiber towels when appropriate.
- Remove as much moisture as possible.
- Allow the seats to dry completely.
Manual cleaning requires more patience because you have less ability to extract moisture and suspended dirt than you would with an upholstery extractor.
How to Keep Car Seats Cleaner for Longer:

A deep clean is much easier when dirt does not have months to accumulate.
Simple Maintenance Habits
- Vacuum the seats regularly.
- Clean spills as soon as possible.
- Avoid eating messy foods in the car.
- Use appropriate seat covers when necessary.
- Remove pet hair frequently.
- Keep windows closed during dusty conditions.
- Wipe leather seats with suitable products.
- Clean children’s messes promptly.
Small maintenance sessions can dramatically reduce the amount of work required during the next deep clean.
When Should You Hire a Professional?
Professional detailing may be worthwhile when seats have severe staining, smoke odor, mold concerns, extensive pet contamination, or deeply embedded grime.
It is also a sensible option when the upholstery is delicate or when you are unsure about cleaning seats containing integrated electrical or safety components.
Professional Cleaning May Be Especially Useful For
- Severe water or beverage spills
- Long-standing odors
- Large areas of staining
- Smoke-contaminated interiors
- Pet accidents
- Delicate premium upholstery
- Vehicles being prepared for sale
A professional detailer can also use commercial extraction equipment that removes more moisture and suspended soil than basic hand cleaning.
Quick Deep-Clean Checklist
Before finishing, check each item:
-
Loose debris removed
-
Seats thoroughly vacuumed
-
Stains pre-treated
-
Appropriate cleaner selected
-
Cleaner gently agitated
-
Dirty moisture removed
-
Seams and edges cleaned
-
Leather conditioned when appropriate
-
Odor source addressed
-
Seats completely dried
-
Electrical and airbag areas kept protected
FAQs About Deep Cleaning Car Seats
What is the best way to deep clean car seats?
For fabric seats, vacuum thoroughly, pre-treat stains, apply an appropriate upholstery cleaner, gently agitate the fabric, remove dirty moisture, and allow the seats to dry completely. Always confirm the material and manufacturer’s cleaning instructions first.
Can I use carpet cleaner to deep clean car seats?
Some carpet and upholstery cleaners can be suitable for fabric car seats, but check the product label before use. Automotive upholstery products are often a safer choice because they are formulated specifically for vehicle interiors.
How do I deep clean cloth car seats without a machine?
Vacuum the seats, treat stains, apply a small amount of upholstery cleaner, gently brush the fabric, and use microfiber towels to remove loosened dirt and moisture. Good ventilation is especially important afterward.
Can I use dish soap on car seats?
It is better to use a cleaner designed for the specific upholstery material. Dish soap can leave residue or affect certain finishes, so it should not be treated as a universal car-seat cleaner.
How do you remove bad smells from car seats?
Clean the material responsible for the odor rather than relying only on fragrance. Remove food residue, spills, pet contamination, or other sources and allow the upholstery to dry completely.
How often should fabric car seats be deep cleaned?
Every three to six months is a reasonable general interval for many vehicles, but heavily used family or pet vehicles may benefit from more frequent cleaning.
Can you steam clean car seats?
Some automotive upholstery can tolerate steam cleaning, but the manufacturer’s recommendations should be checked first. Excessive heat or moisture can damage certain materials, adhesives, electronics, or seat components.
How do I dry car seats after deep cleaning?
Remove as much moisture as possible using towels or suitable extraction equipment, then provide strong airflow and ventilation. Keep the vehicle open in a safe, dry environment until the upholstery and underlying cushion are completely dry.
Should I remove car seats before cleaning them?
Do not remove factory-installed vehicle seats unless necessary and unless you understand the safety and electrical implications. Modern seats may contain wiring, sensors, heaters, and airbags. Follow the vehicle manufacturer’s instructions.
Why do my car seats look dirty again after cleaning?
Cleaner residue, remaining moisture, incomplete soil removal, or permanent staining can cause this problem. Using excessive detergent can also leave a sticky residue that attracts new dirt.
Final Thoughts
Deep cleaning car seats is mainly about using the right product, controlled moisture, gentle agitation, thorough soil removal, and complete drying. Fabric seats generally require a different approach from leather, vinyl, suede-like, or perforated upholstery.
Take your time rather than trying to make the seats perfectly clean in one aggressive session. Careful preparation and proper drying can improve the appearance of the interior while reducing the risk of upholstery damage, lingering odors, and moisture-related problems.